Continuing from the previous part, let's finish the Nintendo 3ds' curfum.
If you read this article first, you should read the previous article.
First of all, there are a lot of files for this episode.
First
1.Luma3DS files
2.SafeB9Installer file
3.boot9strap
download it.
This is the app file downloaded as of November 2022.
(The version may be different in case you don't know, so the link is also attached, so you can
download it from the site. Just unzip the zip file.)
1. Install the custom installer
It doesn't make sense to install it, in fact you just download and paste it.
At the top of the Nintendo SD card
- Paste the Luma3ds unzipped file (boot.3dsx, boot.frim)
- the SafeB9SInstaller file unzipped file (SafeB9SInstaller.bin).
- Create a folder called boot9strap at the top of the SD card
and put boot9strap.firm and boot9strap.firm.sha extracted from the boot9strap.zip file.

As shown in the picture, put the file at the top, and it is not included here,
but create an additional boot9strap folder and put the file in it.
If the file is properly attached, remove the SD card, insert it into Nintendo, and turn on the power.
Device Settings->Data Management->DSI Ware Data Management-> Click SD Card.
Then, a screen with only a few menus on a black background will
appear. Select Install unSAFE_MODE and press the A key.
The unit's power will be turned off.
2. Settings after entering safe mode
After turning off the power of the main unit, turning it on again was the most difficult for me.
To enter the safe mode (unsafe_mode)
, turn on the power while pressing <L + R + button on the cross key + A> .
(Even though I set it to a large number, I recommend turning it on with the help of people around you because your fingers are twisted; anyway, you have
to turn on the power while pressing a number of keys like this to enter safe mode.)
When you turn on the Nintendo power, a message asking if you want to update and the
update progress-> Agree to terms and conditions -> Error code (033-1099) Press ok.
(You don't have to worry about the error code appearing.)
Afterwards , go to
Internet Connection Settings > Access Route 1 -> Change Settings to
the right page one more time.
Navigate to the right page and click Proxy Settings -> Detailed Settings to
reboot Nintendo and an arrow will appear on the screen.
It will come out without distinction between right, left, top and bottom. Press the cross keys in the order and press the
button to move to Luma3DS.
3. Luma3DS menu settings
Luma3DS will be explained later, but it is an essential
program for Korean patching. There are several more ways to patch Hangul, but
since it is the most popular,
you will have to go in and out of luma even after the perm.
Once luma is running,
check the second and third items
(x) Enable game patching
(x) Show NAND or user string in System Settins
and press the start button to exit and reboot.

4. After reboot
Go back to your console settings. Go to Data Management -> DSiWare Data Management

Press the SD card to enter Bannerbomb3, then press Uninstall unSAFE_MODE to
delete safe mode. After the Nintendo 3DS power is automatically shut down and the power is turned off completely
, extract the SD card of the Nintendo 3DS and go to the Nintendo 3DS -> ID folder -> ID folder ->
Nintendo DSiWare folder again on the computer and delete the F00D43D5.bin file..
5. Preparing detailed program apps
There are programs (apps) that must be installed in order to maintain the firm, and there
are apps that can be maintained even if you do not have to do it selectively.
The essential apps to install are
1. Homebrew Launcher (Homebrew Launcher Wrapper)
3dsx file launcher app
2. GodMode(GodMode9)
System management app such as game file encryption, decryption, and extension conversion after firmware
update 3. DSP1 (DSP1)
Custom Firmware Sound App
4. FBI (FBI)
CIA file install app
5. CTR-no-timeofrrset(ctr-no-timeoffset )
rtc (real time clock) and 3ds time matching app
-------------------------------------- ---------------------------
This is an additional app.
6.Anemone3DS
3ds theme application app (Domestic hairdressing does not have a theme originally, so it is not necessary.)
7.Checkpoint
Save file extraction, injectable app (I have never personally used it.)
8.Universal-Updater
Apps that can update the Luma app
As expected, this is the app file downloaded as of November 2022.
(The version may be different in case you don't know, so the link is also attached, so you can
download it from the site. Just unzip the zip file.)
6. Create folder and install app
Shut down the main unit and connect the SD card and computer.

1. Create a 3ds folder at the top -> Copy the 3dsx extension file.
- ctr-no-timeoffset.3dsx , FBI.3dsx
2. Create a cias folder at the top->Copy the cia extension file.
- Homebrew_Launcher.cia, FBI.cia, DSP1.cia, lumaupdater.cia,
Anemone3DS.cia, Checkpoint.cia
3. Create a new folder named payloads in the luma folder.
4. After unzipping GodMode9
, put the GodMode9.firm file in the payloads folder you just created.
5. Put the gm9 folder that comes out when GodMode9 is unzipped at the top of the SD card.
7. Install the app after running the home brew launcher
Insert the SD card into Nintendo, boot it up, and run download play.
1. Press [L Button] + [Cross Key Down Button] + [Select ] at the same time to enter the Rosalina menu.

2. Select Miscellaneous options from the Rosalina menu.

3. Switch the hb. Select title to the current app.
4. When the operation is completed ( operation succeeded ), continue pressing the B button to bring
up the Rosalina menu.
5. Press the Home button to end download play.
6. If you click download play again, you will be connected to the homebrew launcher.
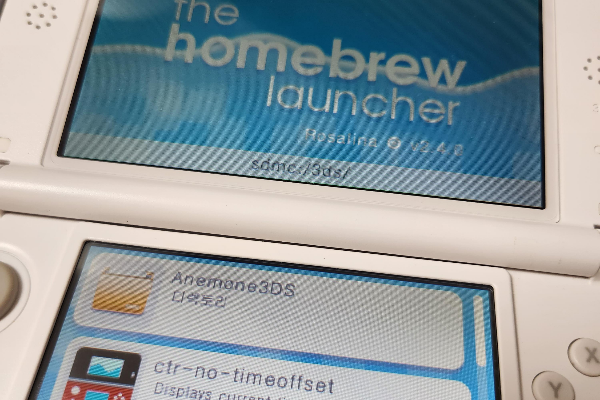
If this screen appears, success.
7. Enter ctr-no-timeoffset at the bottom and press A to set the offset to 0.
8. Press the start button to come out to the menu and press FBI to execute.

9. Click SD->cias->current directory->Install and delete all CIAs to install apps.
10. When the installation is finished and you return to the home menu, gift boxes will appear, unpack them all.
11. Run the added dsp1 app in the home menu. When finished, press the B key to
automatically delete and turn off the power.
8. Setting up Godmod
1. Turn on the power while pressing the Start button. Enter Godmod.
(Godmod is often used afterwards, so
it's good to remember how to turn on the power while pressing the start button.)
2. RTC time setting. It doesn't matter if you don't.
3. Press the home button to open the action menu.
Scripts -> GM9MegaScript -> Scripts from Plailect's Guide -> Click
Setup Luma3DS to CTRNAND and
enter the same commands that appear on the screen.
4. Press Cleanup SD card.
5. Go to Backup Options and click SysNAND Backup.
(NAND backup takes some time. Please be patient)
6. Select Dump Boot9.bin & Boot11.bin from Dump Options..
7. When done, go to [S:] SYSNAND VIRTUAL.
8. Click essential.exefs and select Copy to 0:/gm9/out.
(It doesn't matter if you overwrite it.)
9. When finished, go to the menu and press Poweroff system to turn off the power.
9. Done
Curmudgeon is complete. You worked hard. In the future, we will learn more about installing games and applying Korean patches in conjunction with the firm.
[Add]
Please make a backup copy of the contents of the sd card that has been worked on so far in case of an unexpected brick
. You can remove and store only the NAND files, but
we recommend that you simply store the files in the sd card on your computer.
'For foreigners > English' 카테고리의 다른 글
| Nintendo 3ds rom file download site collection (0) | 2023.01.24 |
|---|---|
| 3ds rom file encryption decryption decryption (0) | 2023.01.24 |
| Convert 3ds 3ds extension file cia (0) | 2023.01.24 |
| # Brick recovery after Nintendo 3ds firmware (power, led blue light) (0) | 2023.01.24 |
| # How to Nintendo 3ds custom firmware part 1(for the latest version after 11.15) (0) | 2023.01.24 |